
The phrase “rapid prototyping” gets misread constantly. Most people encounter it as shorthand for 3D printing — fast output, low fidelity, useful for early concept checks. That’s one technique. It’s not a development strategy, and treating it like one is how products end up in expensive rework cycles that could have been avoided.
What the term actually describes is a broader discipline: converting an idea into testable physical parts fast enough to make decisions on real evidence rather than assumptions. The issue is when inventors stop at the “fast and cheap” methods and mistake them for the whole process. A 3D-printed part validates geometry. It doesn’t tell you how your part will behave in production-grade material, whether tolerances will hold at assembly, or whether the design is manufacturable at volume — and those are the questions that determine whether a product can actually ship.
A manufacturing-oriented prototyping strategy works differently. It matches technique to question at each stage of development, and it keeps production feasibility in view from day one. The goal isn’t to produce objects — it’s to reach tooling-ready design with the fewest late-stage surprises and the lowest total cost. This guide walks through six techniques that cover that full range, from early concept exploration to production-representative validation, with a clear view of what each one answers and what it doesn’t.
Quick Answer
Six product development prototyping techniques cover most product development needs: sketches and paper mockups (concept exploration), CAD visualization (digital iteration before any physical part), CNC machining (production-representative material behavior), soft tooling (small batches of near-production parts), looks-like prototypes (aesthetic validation), and works-like prototypes (mechanism and function validation). The most important discipline is matching the technique to the question — different fidelities answer different questions, and using one prototype to answer everything is the most common prototyping mistake.
Key Facts
Different prototyping techniques answer different questions — no single method covers form, fit, function, material behavior, and production feasibility at once
The majority of a product’s manufacturing cost is determined by decisions made during the design and prototyping stages, before tooling is committed
CNC machining and soft tooling deliver production-representative parts — essential for structural, material, and integration validation before committing to production tooling
Looks-like and works-like prototypes can be split to validate aesthetic and functional decisions independently, on different timelines and budgets
Iterative prototyping (test → fix → re-test) consistently outperforms single-stage prototyping for catching design problems before tooling is committed
Prototyping is where assumptions get tested against physical reality. Every assumption validated in a prototype is one less assumption that can fail in production — but only if the prototype actually tests the assumption being made. Form-and-feel questions need different prototypes than structural questions; aesthetic decisions need different prototypes than mechanical ones. The six techniques covered here are the practical toolkit a designer or inventor uses to answer specific questions at the cheapest cost.
Key Takeaways
Six distinct techniques cover most product development prototyping needs, each answering a different question
CNC machining produces parts in real materials for structural, thermal, and assembly validation
Soft tooling bridges prototyping and production with small batches of production-representative parts
Looks-like and works-like prototypes can be split when budget requires — aesthetic validation separated from functional validation
Matching the technique to the question matters more than the speed of any single method
Integrated product development combining the right prototyping techniques with DFM review reduces late-stage surprises and launch risk
Table of Contents
Technique 1 — Sketches and Paper Prototypes
Technique 2 — CAD Visualization and Digital Prototyping
Technique 3 — CNC Machining for Material and Structural Validation
Technique 4 — Soft Tooling for Production-Representative Batches
Technique 5 — Looks-Like Prototypes for Aesthetic Validation
Technique 6 — Works-Like Prototypes for Functional Validation
How Rabbit Product Design Uses All Six Techniques in Integrated Product Development
Technique 1 — Sketches and Paper Prototypes
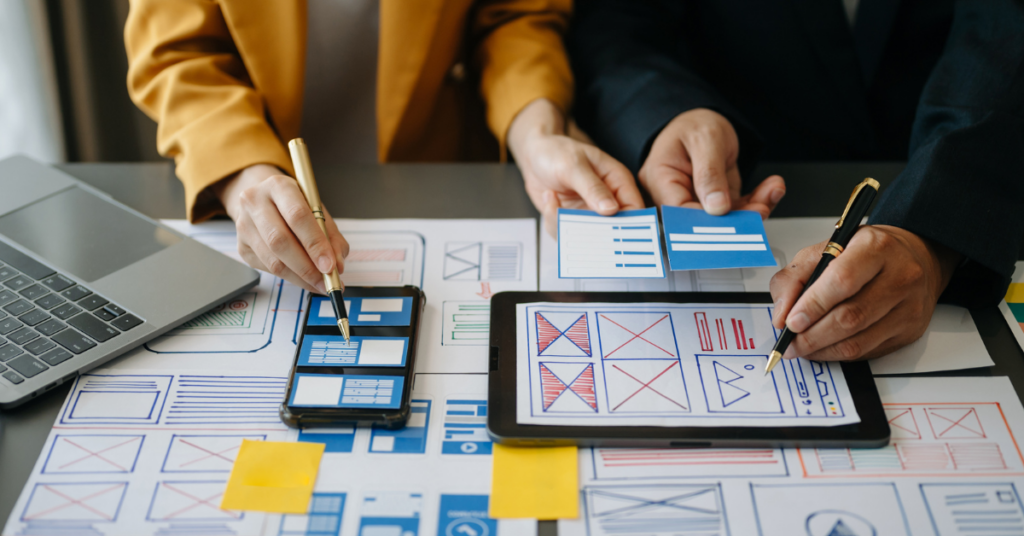
Sketches and paper prototypes are the lowest-fidelity, fastest-to-produce, cheapest prototyping methods — and for early concept work, often the most useful. A pen sketch communicates an idea in seconds; a paper mockup of a control panel layout validates the basic interaction model before any digital work begins.
This technique is most valuable when multiple architectural directions are still being considered. A few hours of sketching can replace days of CAD work on the wrong concept. For inventors who haven’t been through product development before, the temptation is to jump straight to a 3D model — but skipping the sketch stage often means engineering effort gets committed to a direction that wouldn’t survive a basic concept review.
Sketches and paper prototypes answer questions about concept and layout: whether the basic idea makes sense, whether the proportions feel right, whether the user interaction model is intuitive. They do not answer anything about material behavior, manufacturing feasibility, or production cost — a sketch can show you what you want, but it cannot tell you whether it can be made.
The most useful sketches are honest about what they’re testing. A grip-and-feel sketch focuses on how the product sits in the hand; a layout sketch focuses on where controls fall; a system sketch focuses on how parts relate to one another. Trying to make one sketch answer every question is what turns this technique from useful to misleading.
Sketches and paper prototypes are the cheapest and fastest prototyping methods available.
They are most valuable in early concept exploration when multiple directions are still open.
They communicate ideas in a way that words cannot — useful with stakeholders, manufacturers, or potential customers.
They answer questions about concept and layout, not about feasibility or material behavior.
Many cheap iterations at this stage prevent one expensive commitment downstream.
The biggest mistake at this stage is skipping it. Moving to CAD before basic concept questions are settled is the most common source of wasted engineering effort in first-time product development.
Technique 2 — CAD Visualization and Digital Prototyping
CAD visualization uses 3D modeling software — SolidWorks, Fusion 360, Rhino, and similar platforms — to produce digital prototypes that can be rotated, sectioned, animated, and rendered photorealistically before any physical part is made. Modern CAD platforms include simulation tools that can stress-test the design under load, analyze thermal behavior, and check for assembly conflicts — all in software, at near-zero per-iteration cost.
For inventors and small founders, modern CAD has democratized rigor that used to require enterprise engineering departments. Finite element analysis (FEA) catches stress concentrations and fatigue-prone geometries at the CAD stage. Topology optimization suggests geometries that meet structural requirements with less material. Photorealistic rendering communicates the final design intent to investors, retailers, or licensees before any physical part is built.
Assembly checks in CAD are one of the highest-ROI uses of the technique. Sectioning a model and checking for interference between parts catches problems that would otherwise surface only at the prototype stage — or worse, at tooling. For products with multiple molded parts, electronic components, and fasteners, the assembly check at the CAD stage is what prevents the most expensive late-stage redesigns.
CAD visualization answers questions about geometry, assembly, and structural behavior under simulation. What it doesn’t answer is how the part will actually feel in the hand, how production materials will behave under real conditions, or what the manufacturing process will introduce in terms of parting lines, draft angles, and surface character. Those questions require physical prototypes.
CAD visualization is dramatically cheaper than physical prototyping for visual and structural questions.
Modern CAD includes simulation tools — FEA, thermal, motion studies — that used to require enterprise engineering departments.
Photorealistic rendering communicates final design intent before any physical part is built.
Assembly checks in CAD catch interference and packaging conflicts at near-zero cost.
CAD is the bridge between concept sketches and physical prototyping — not a replacement for either.
The skill required to use CAD platforms well is what an experienced engineering team still provides. The tools have democratized; the judgment to apply them well has not.
Technique 3 — CNC Machining for Material and Structural Validation
CNC (computer numerical control) machining is a subtractive process that mills, turns, or drills parts from a solid block of material. CNC produces parts in production-representative metals (aluminum, steel, titanium) and engineering plastics (POM/Delrin, polycarbonate, ABS, PEEK) with tolerances close to production parts. For structural validation, material behavior testing, and pre-tooling production-representative samples, CNC is the standard.
CNC machining answers questions that lower-fidelity prototyping methods cannot. How does the part perform in its actual material? Will it survive structural tests, thermal cycles, and assembly forces? Do the tolerances work in practice? Is the design ready for production tooling? These are the questions where simulation gives indicative answers and CNC produces real evidence.
For hardwood products — furniture, fixtures, displays, storage — CNC machining is the standard for fabricating wood components and for the metal hardware fittings that join them. The wood-to-hardware tolerance interface is the common pain point in hardwood product development, and CNC is what validates it before production scale. For soft goods with structural hardware (buckles, frames, mounting plates), CNC produces small quantities of these components for validation alongside the fabric production cycle.
For consumer products with structural elements, CNC validates the load-bearing parts before injection mold tooling is committed. A part that survives CNC-machined testing in the production material is dramatically more likely to survive in production than one validated only in lower-fidelity prototypes. The investment in CNC at this stage protects every dollar of subsequent tooling commitment.
CNC machining is more expensive per part than early-stage prototyping methods, but the cost is targeted: a few well-chosen CNC prototypes for the structural-critical parts of an assembly answer questions that no other technique can. The discipline is using it where it earns its cost — not as a default, but as the right tool for material and structural questions.
CNC machining produces parts in production-representative materials and tolerances.
It is essential for structural, thermal, and assembly validation when material behavior matters.
For hardwood products, CNC is the standard for fabricating wood components and metal hardware fittings.
For consumer products with structural elements, CNC validates load-bearing parts before injection mold tooling is committed.
CNC is more expensive per part than early-stage prototyping methods but answers questions they cannot.
CNC machining is what allows a structural assumption to graduate from simulation to evidence — before any tooling investment is committed.
Technique 4 — Soft Tooling for Production-Representative Batches
Soft tooling — sometimes called bridge tooling — covers techniques that produce small batches of parts in production-representative materials without committing to full production molds. Common methods include silicone molds for urethane casting, aluminum tooling for low-volume injection molding, and vacuum casting for high-fidelity reproductions of a CAD design. It sits between prototyping and production, and for many inventors it’s the technique they didn’t know existed.
Soft tooling produces 10 to 500 parts in production-representative materials at a fraction of full-tooling cost. For inventors planning a Kickstarter, a regional retail test, or an Amazon pilot launch, this is often the most economical path to market. Full injection mold tooling requires committing tens of thousands of dollars to a design that hasn’t yet been validated at scale. Soft tooling lets the design ship at small volume first — generating real production data, real customer feedback, and real revenue — before that commitment is made.
For pre-launch validation, soft-tooled parts close the gap between "we have a prototype" and "we have a manufacturable design." The parts are in production-representative materials and tolerances, which means the assembly process, the user testing, and the quality testing all happen against parts that closely resemble what the factory will eventually make. Questions about durability, fit, and appearance that early-stage prototypes can’t fully answer get resolved here.
For soft goods products with structural hardware — buckles, frames, clips, mounting plates — soft tooling produces the rigid components alongside the fabric or flexible material development cycle. The two production worlds get coordinated through small batches before either is committed to full production. This avoids the most common soft-goods development surprise: discovering at full production that the hardware and the fabric components don’t integrate the way the prototype suggested.
Soft tooling has limits. The materials behave similarly but not identically to hard-tooling production materials. Surface character, gate placement, and ejection behavior may differ. For most decisions, this difference is small enough to be useful evidence. For final production sign-off, it isn’t a substitute for first-article inspection of actual production parts.
Soft tooling produces 10 to 500 parts in production-representative materials at a fraction of full-tooling cost.
It bridges prototyping and production — answering questions full tooling can’t be committed for yet.
For Kickstarter or small-launch products, soft tooling can deliver launch quantities without full injection mold investment.
Soft goods products use soft tooling to coordinate structural hardware with the fabric production cycle.
Soft-tooled parts are close to production-representative, but not identical — final sign-off still requires first-article inspection.
Most first-time inventors don’t know soft tooling exists. It is one of the highest-leverage techniques in the entire toolkit, particularly for products heading to a small launch rather than a million-unit production run.
Technique 5 — Looks-Like Prototypes for Aesthetic Validation
A looks-like prototype is a non-functional model that looks like the final product but doesn’t do anything. It exists to answer visual, aesthetic, and market-perception questions: what does the product look like in real materials, what does it feel like in the hand, how does it photograph, how does it sit on a shelf, how does the brand identity come through. The internals are empty or non-functional; the exterior is as close to final as possible.
Looks-like prototypes are useful when aesthetic decisions need validation before the functional work is complete. A photoshoot for a launch campaign needs to happen before the production parts exist. An investor pitch benefits from a tangible model of the product even if the firmware isn’t ready. A retailer presentation that involves picking the product up and turning it over works best when the prototype looks like what the customer will actually buy.
Common construction methods include vacuum-cast urethane parts that capture surface detail and finish, CNC-machined housings without internals, and high-fidelity hand-finished prototypes. Each method has trade-offs in finish quality, cost, and turnaround time. The discipline is matching the construction method to the audience and the use — a photoshoot prototype can be more fragile than a trade-show prototype, which has to survive handling.
The most important rule with looks-like prototypes is honesty about what they represent. A looks-like prototype that’s mistaken for a working one creates expectations the production version may not meet. A potential investor or retailer who picks it up and discovers it doesn’t do anything won’t be impressed by the visual fidelity; they’ll be confused. Clear communication about what the prototype is and isn’t protects the relationship while preserving the value of the technique.
Looks-like prototypes are non-functional models built for aesthetic and market validation.
They are useful for photography, retailer presentations, and market research before functional prototypes are complete.
The technique decouples aesthetic validation from functional validation — saving time and budget.
Common methods: vacuum-cast urethane parts, CNC-machined housings without internals, and high-fidelity hand-finished prototypes.
The discipline is honesty about what the prototype represents — visual fidelity without function.
A looks-like prototype that’s clearly labeled and used appropriately can save weeks of timeline and significant budget at critical moments — a trade show, an investor pitch, or a launch campaign photoshoot.
Technique 6 — Works-Like Prototypes for Functional Validation
A works-like prototype is the opposite of looks-like. The mechanism works, the electronics work, the firmware runs, the assembly is functional — but the housing may be ugly, parts visible, cables external. It exists to answer functional questions: does the product do what it’s supposed to do, does the mechanism survive use, do the electronics behave correctly in their physical form factor, does the assembly process actually work.
Works-like prototypes enable mechanism, electronics, and firmware validation in parallel with industrial design refinement. A team can be improving the visual design (the looks-like work) while another team is validating that the product functions correctly (the works-like work). Each prototype answers a narrower set of questions, but each set of questions gets answered more clearly than a combined prototype would manage.
For connected products — IoT devices, wearables, smart appliances — the works-like prototype is where firmware and app behavior get tested in real hardware. The PCB lives inside something, even if that something doesn’t look like the final housing. Connectivity, thermal behavior, battery performance, and user-facing software interactions get validated against the physical reality of the design before any housing tooling is committed.
For durability and reliability testing, the works-like prototype is the right vehicle. Drop tests, life-cycle tests, and stress tests need parts that function, not parts that look pretty. The aesthetic questions are answered separately, and the testing can happen earlier and more honestly when the team isn’t worried about damaging an expensive looks-like model.
Splitting works-like from looks-like is a budget discipline as much as a technical one. Each prototype gets built for what it’s actually being used for. The combined cost is usually lower than building one high-fidelity prototype that tries to answer both questions — and the answers are clearer.
Works-like prototypes test function without committing to final aesthetics.
They allow mechanism, electronics, and firmware validation in parallel with industrial design refinement.
For connected products, the works-like prototype is where firmware and app behavior get tested in real hardware.
Durability and reliability testing happens on works-like parts, not on aesthetic models.
Splitting works-like from looks-like reduces total cost and produces clearer answers to each set of questions.
The looks-like / works-like split is a core technique in professional product development. It separates the aesthetic question (how does it look?) from the engineering question (does it work?), letting each get answered with the right method and the right level of polish.
How Rabbit Product Design Uses All Six Techniques in Integrated Product Development
Rabbit Product Design is a product development firm built around the inventors, entrepreneurs, and small founders who carry the most risk on a first physical product. The firm has been in business for nine years, has worked on over 2,000 products, and is staffed entirely by senior engineers — an average of 27 years of experience per team member.
Rabbit’s prototyping capability spans all six techniques covered in this guide — from printing to molding, CNC machining, and soft tooling. A typical engagement matches the technique to the question at each stage: sketches and CAD for concept work, CNC machining for structural and material validation, soft tooling for production-representative batches, and dedicated looks-like and works-like prototypes when aesthetic and functional validation need to be split.
The four-phase service model covers research and ideation, design and prototype, sourcing and manufacturing, and branding and marketing. One coordinated team handles patent research, industrial design, mechanical engineering, electronics, firmware and app development, the full prototyping toolkit, supply chain qualification, tooling, factory management, shipping logistics, and the brand and go-to-market work that turns a manufactured product into a launched one.
Rabbit’s focus reflects who actually benefits from this breadth: consumer products of all kinds, soft goods (bags, cases, wearables, sports gear, pet products), hardwood products (furniture, fixtures, displays, storage), electronic products and IoT devices, and inventor or entrepreneur projects spanning every category. Most clients are individuals or small business owners — the audience that large enterprise design firms are not built to serve at accessible cost.
Three things shape how engagements run day-to-day. Senior engineers handle every project from the start — there is no junior tier doing the early work. DFM and risk mitigation are embedded from concept onward, not bolted on as separate audits at the end. And the firm is built to be accessible to people developing their first product, not only to funded startups with seven-figure budgets.
Key Services
Phase 1 — Research & Ideation
Patent research and freedom-to-operate analysis
Product evaluation and opportunity validation
Technology research
Phase 2 — Design & Prototype
Industrial design and creative product design
Mechanical engineering
Electronics design, firmware development, and app development
Prototyping: from printing to molding, CNC machining, and soft tooling
Design reviews at defined gates
Phase 3 — Sourcing & Manufacturing
Supply chain qualification
Tooling and molding
Factory management and quality control
Production builds, shipping, and logistics
Phase 4 — Branding & Marketing
Brand identity and positioning
Go-to-market strategy
Operational launch support
Key Benefits
Senior engineers on every project, averaging 27 years of experience
Full prototyping toolkit applied where each technique earns its cost
One coordinated team from concept through launch — no agency handoff errors
9 years and over 2,000 products of accumulated process experience
End-to-end services accessible to individual inventors, not only to funded companies
To start a product development engagement that covers all six prototyping techniques under one team, contact Rabbit Product Design.
Conclusion
The six rapid prototyping techniques covered here — sketches and paper, CAD visualization, CNC machining, soft tooling, looks-like prototypes, and works-like prototypes — are the practical toolkit that takes a product from idea to launch. The single most important skill in using them is knowing which one answers which question. No technique does everything; every technique excels at something. Inventors and small founders who match technique to question move faster and waste less budget than those who default to whichever method is most familiar. To start a product development engagement with senior engineers covering all six prototyping techniques, contact Rabbit Product Design.
FAQ
Which prototyping technique should I start with?
Start with sketches and paper prototypes — the cheapest, fastest, and most useful method for early concept work. Once the concept is settled, move to CAD visualization for the digital design, then to physical prototypes (CNC machining or soft tooling) matched to the questions being asked at each stage. Skipping early-stage techniques to jump to physical prototypes is the most common cause of wasted engineering effort in first-time product development.
How much does each prototyping technique typically cost?
Costs vary widely by product and complexity. Sketches and paper prototypes: hours of time. CAD visualization: depends on whether design is internal or outsourced. CNC machining: dozens to thousands per part depending on material, complexity, and tolerances. Soft tooling: thousands of dollars for the tool itself, then per-part costs much lower than full production tooling. Looks-like and works-like prototypes: depend on which underlying physical method is used. The most important budgeting principle is matching the cost to the question being asked.
How do I know when to move from low-fidelity to higher-fidelity prototyping?
Move to higher-fidelity prototyping when the question you need answered can’t be answered by the technique you’re using. Sketches answer concept questions; CAD answers digital design questions; physical prototypes answer how-does-it-behave-in-reality questions. The signal that it’s time to move up in fidelity is a specific question the team can’t resolve at the current level — for example, a debate about whether a structural element will survive load can only be settled with a part in production-representative material, which means CNC machining or soft tooling, not a digital model or a low-fidelity physical prototype.
What’s the difference between looks-like and works-like prototypes?
A looks-like prototype tests visual appeal and aesthetic perception without function — it looks like the final product but doesn’t do anything. A works-like prototype tests function without final aesthetics — the mechanism, electronics, and firmware all work, but the housing may be ugly and the parts visible. Splitting them lets industrial design and engineering teams make progress in parallel, and lets aesthetic decisions get validated independently of functional ones. The combined cost of two narrower prototypes is usually lower than building one high-fidelity prototype that tries to answer both.
When should I use soft tooling instead of going straight to full production tooling?
Soft tooling is the right choice when 10 to 500 parts in production-representative materials are needed but full injection mold investment isn’t yet justified. Common cases: a Kickstarter or small launch before full production volume is justified, small-batch user testing where lower-fidelity prototypes aren’t acceptable, or pre-launch validation where the parts need to closely resemble what the factory will eventually produce. Soft tooling is often the most economical path from prototype to small commercial launch — and the technique that lets a first product reach the market without committing to tooling that hasn’t yet been validated at production volume.
Sources
Keywords: rapid prototyping techniques, prototyping services, CNC machining, soft tooling, product design consulting
