
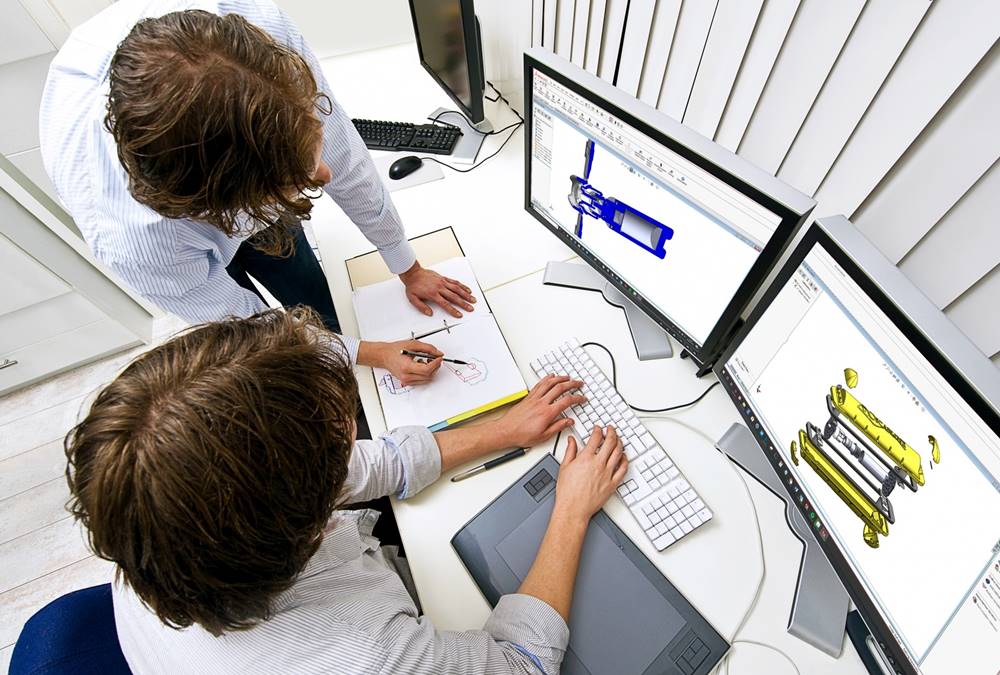
Bringing a physical product from idea to market is not a single act of engineering — it is a structured sequence of decisions across seven distinct stages, each answering specific questions, producing specific deliverables, and protecting the launch from the most common failure modes. This guide walks through all seven stages, what each one covers, and what inventors, entrepreneurs, and small business owners can expect at each step from concept through commercial launch.
Quick Answer
Industrial product design runs through seven stages from concept to commercial launch: research and patent validation, concept development, industrial design, mechanical and electronics design, prototyping and validation, manufacturing and sourcing, and branding and launch. Each stage produces specific deliverables that gate the next, preventing the expensive backtracking that derails first-time launches. For inventors and small founders, working through all seven stages with an integrated team reduces both timeline and risk compared to managing separate vendors for each stage.
Key Facts
The majority of a product’s total manufacturing cost is determined during the early design stages — before any tooling is cut [source]
Design changes made at the CAD stage are dramatically cheaper than the same changes made after tooling has been committed [source]
Running industrial design and mechanical engineering concurrently compresses development timelines compared to sequential handoffs between disciplines [source]
Patent research conducted at the start of an engagement prevents the most expensive late-stage failures — freedom-to-operate problems discovered after tooling has been cut are orders of magnitude more expensive to resolve [source]
A gated, multi-stage process eliminates the unplanned iteration loops between design and manufacturing that account for most timeline overruns in first-time product launches [source]
The seven stages cluster into four broader phases used by integrated product development firms: research and ideation (Stage 1), design and prototype (Stages 2 through 5), sourcing and manufacturing (Stage 6), and branding and marketing (Stage 7). The stage-by-stage framework gives inventors a clear roadmap; the four-phase framework gives a service model that maps onto it. Both describe the same underlying work.
Key Takeaways
Seven discrete stages take a product from concept to commercial launch — research, concept, industrial design, mechanical and electronics design, prototyping and validation, manufacturing and sourcing, and branding and launch.
Each stage produces specific deliverables that gate the next — a structured process prevents the expensive backtracking that derails first-time launches.
Patent research at Stage 1 prevents the most expensive late-stage failure: discovering a blocking patent after tooling is committed.
Industrial design (Stage 3) and mechanical engineering (Stage 4) must run in parallel, not in sequence, to avoid the most common cause of late-stage rework.
Prototyping (Stage 5) requires matching the method to the question — 3D printing for form, CNC for material behavior, soft tooling for production-representative parts.
Branding and launch (Stage 7) is the stage most inventors discover too late — a great product without a clear brand and go-to-market plan tends to under-perform its potential.
Table of Contents
Stage 1 — Research & Patent Validation
Stage 2 — Concept Development
Stage 3 — Industrial Design
Stage 4 — Mechanical & Electronics Design
Stage 5 — Prototyping & Validation
Stage 6 — Manufacturing & Sourcing
Stage 7 — Branding & Launch
How Rabbit Product Design Guides Inventors Through All 7 Stages
Stage 1 — Research & Patent Validation
Stage 1 validates that the opportunity is worth pursuing and the design space is open before any engineering investment is committed. It is the cheapest stage to do well and the most expensive one to skip. Three activities sit at the center of it: patent research, product evaluation, and technology research.
Patent research and freedom-to-operate analysis identify existing IP that could block or constrain the design. Discovering a blocking patent at the prototype stage means redesigning around it. Discovering one after tooling has been cut means scrapping the tooling. Discovering one after launch means an injunction. The same problem caught at Stage 1 means choosing a different approach before any engineering money is spent. Patent research also identifies what is patentable in the new idea — the basis for protecting the commercial opportunity that justifies the development investment in the first place.
Product evaluation asks the harder question: even if the design space is open, is the opportunity real? Who is the customer? What is the differentiation? What is the realistic market size? For an inventor, this stage is where the difference between a fundable idea and a hobby project becomes visible. It is also where many inventors discover that their idea is real but the version they imagined is not the one the market actually wants.
Technology research identifies the materials, components, and methods the product can realistically use given the target unit cost, target volume, and timeline. A product whose preferred materials don’t exist at the required scale or price isn’t a product yet — it’s a design challenge. Surfacing these constraints at Stage 1, before engineering is committed, prevents the late-stage pivots that destroy budgets.
Patent research and freedom-to-operate analysis identify blocking IP before engineering investment is committed.
Patentability assessment identifies what is protectable in the new idea — the commercial moat.
Product evaluation tests the opportunity: who buys it, why, and at what price.
Technology research surfaces material, component, and process constraints before they become engineering surprises.
Deliverables: IP clearance report, patentability summary, market positioning brief, technology selection.
Stage 1 maps to Phase 1 of a four-phase product development framework — research and ideation. It is the stage most first-time inventors underweight, and the one where the most expensive failures get prevented for the lowest cost.
Stage 2 — Concept Development
Stage 2 translates the research findings into functional requirements and a proof of concept. It is the bridge between "we have an idea" and "we have a design." Two activities define it: requirements capture and concept screening.
Requirements capture turns a product idea into specific engineering targets. A useful requirement is precise: "must hold X weight at Y temperature for Z hours" or "must fit in a 50mm cubic envelope at under 200 grams." A vague requirement — "must be strong" or "must look premium" — produces misdirected engineering effort and budget overruns. Quantified requirements at Stage 2 are the guard rail that prevents the project from drifting.
Concept screening evaluates multiple architectural approaches against the requirements before any detailed design begins. Rough sketches, back-of-envelope calculations, and quick simulations are the right tools here — not high-fidelity FEA. A directionally correct screening that eliminates a failing concept in an afternoon saves weeks of detailed engineering on the wrong architecture. The discipline is letting bad concepts die early rather than over-investing in them out of attachment.
Proof of concept demonstrates that the core idea actually works — usually a crude prototype that solves the central technical risk. For a product that depends on a novel mechanism, the proof of concept proves the mechanism. For a product that depends on a particular form factor fitting required components, the proof of concept proves the packaging is feasible. Proof of concept is not a polished prototype; it is targeted evidence that the riskiest assumption is solvable.
Requirements capture quantifies performance, cost, and constraint targets in writing.
Multiple concepts get screened with fast analytical tools before detailed engineering begins.
Concept screening favors directionally correct elimination over false precision in detailed simulation.
Proof of concept demonstrates that the riskiest technical assumption is solvable.
Deliverables: functional requirements document, concept sketches, proof-of-concept demonstration, selected architecture.
Stage 2 also belongs to Phase 2 of the four-phase framework: design and prototype. The stages between it and prototyping (Stages 3 through 5) are where most of the engineering work happens.
Stage 3 — Industrial Design
Stage 3 defines the product’s form, ergonomics, materials, and user interaction — the visible and tactile aspects that determine how it feels in the user’s hand. For consumer products especially, industrial design is one of the largest single factors in whether the product sells. A functionally correct product with bad industrial design tends to under-perform; a great industrial design on a flawed mechanism doesn’t survive contact with the market.
Industrial design covers form language (the geometry and proportions that establish the product’s visual identity), ergonomics (how it sits in the hand, how it loads, how the controls fall to the user), materials and finishes (the choices that determine premium-vs-budget perception), and user interaction (how the user understands and operates the product without instructions).
The critical discipline at Stage 3 is restraint. First-time inventors often over-decorate — adding features, surfaces, and details that increase tooling complexity without improving the user experience. A clean industrial design that uses the fewest elements necessary to communicate the product’s purpose is almost always cheaper to manufacture, easier to assemble, and more memorable in the market than a busier alternative.
Industrial design must run in parallel with Stage 4 (mechanical and electronics design), not before it. Sequential handoffs — industrial design hands off to mechanical, mechanical proposes changes that erode the design intent, industrial revises, the cycle repeats — produce the most expensive late-stage rework in any product category. Concurrent engineering removes the cycle by pressure-testing every choice against the next discipline’s constraints in real time.
Form language establishes visual identity, proportions, and surface character.
Ergonomics covers grip, control placement, and how the product loads in real use.
Materials and finishes (color, material, finish — CMF) determine premium vs. budget perception and unit cost.
Restraint is a discipline — fewer, more intentional elements outperform over-decorated alternatives.
Deliverables: industrial design language, surface models, CMF decisions, ergonomic studies.
Industrial design is one of the disciplines first-time inventors most often try to do themselves, and one where professional skill produces the largest visible difference between a product that feels premium and one that does not.
Stage 4 — Mechanical & Electronics Design
Stage 4 translates the industrial design into manufacturable engineering geometry. Mechanical design defines tolerances, materials, assembly sequence, and structural integrity. For connected products, electronics design, firmware development, and app development run in parallel inside the same workflow. The integration between disciplines at this stage determines whether the design that ships matches the design that was approved.
Mechanical design covers the load-bearing geometry of the product — wall thicknesses, fastener strategy, draft angles for moldability, tolerance specification, and the assembly sequence that determines how parts come together at the factory. Material selection at this stage directly determines machinability, weld quality, surface finish, and unit cost. Choosing a material that fights the manufacturing process drives cost in every subsequent stage.
Electronics design covers PCB layout, antenna placement, thermal management, and connector orientation — all fitting inside the enclosure that industrial design and mechanical design have defined. Firmware development handles the embedded software that runs on the device. App development handles any companion mobile or web application. For an IoT product or any connected device, all four disciplines (mechanical, electronics, firmware, app) have to be coordinated through one workflow, or interface conflicts surface at the prototype stage — or worse, at tooling.
Design reviews at defined gates are the operational mechanism that makes integrated engineering work in practice. A good engagement schedules multi-disciplinary reviews at concept, post-CAD, post-prototype, and pre-tooling stages — catching interface conflicts when changes are still cheap. The same principle applies in non-electronic categories: soft-goods products with structural hardware, hardwood products with metal fittings, consumer products with multiple molded parts — all benefit from formal review gates.
Mechanical engineering covers tolerances, materials, assembly sequence, and structural integrity.
Electronics design covers PCB layout, antenna placement, and thermal management for connected products.
Firmware and app development run in parallel for IoT and connected devices.
Design reviews at defined gates catch interface conflicts before they become expensive.
Deliverables: detailed CAD models, electronics schematics and PCB layouts, firmware and app prototypes (where applicable), design review documentation.
Stage 4 is the longest and most engineering-intensive stage in the process. It is also where the integration between disciplines matters most — mismatches caught here are cheap to fix; mismatches missed here surface at tooling, where they are not.
Stage 5 — Prototyping & Validation
Stage 5 converts CAD models into physical parts that can be tested, and tests those parts against the requirements documented at Stage 2. It is the stage where assumptions get pressure-tested by reality — ergonomic decisions get user-tested, structural decisions get load-tested, and integration decisions get assembly-tested.
The most common Stage 5 mistake is using one prototyping method to answer every question. Different methods answer different questions, and a structured prototyping plan matches the method to the question being asked. 3D printing produces a part in days at low cost and can validate form, fit, and basic geometry — useful for ergonomic testing and user feedback. But 3D printed parts do not represent production materials and do not behave the way the production version will under real-world loads, heat, or wear. For products where material behavior or structural performance is part of what is being tested, 3D printing alone is not enough.
CNC machining delivers production-representative parts in metals and engineering plastics, which means assembly fits, structural tests, and thermal behavior can be validated before tooling is committed. Soft tooling — silicone molds, urethane casting, low-volume injection — produces small batches of parts in production-representative materials, useful for pre-launch validation and small commercial runs before full tooling is ordered.
User testing is the validation activity that catches problems no internal review will find. Five representative users surface roughly 85% of the usability problems in a product, per Jakob Nielsen’s widely-cited research. Short testing rounds repeated between prototype iterations generate more decision-useful data than long single-stage testing reviews. Testing data turns design choices from opinion into evidence — which matters most when an inventor needs to defend the design to investors, retailers, or licensees.
3D printing can validate form and fit early but does not represent production materials or behavior.
CNC machining delivers production-representative parts for structural and material testing.
Soft tooling bridges prototyping and production with parts in production-representative materials.
User testing with five representative users reveals roughly 85% of usability problems (Nielsen).
Deliverables: prototype builds, test reports, user testing data, validated design ready for manufacturing review.
Stage 5 ends when the design has been demonstrated to meet its requirements with evidence from physical parts and real users — not assumptions or simulation alone.
Stage 6 — Manufacturing & Sourcing
Stage 6 takes the validated design into production. It covers supply chain qualification, design for manufacturing review, tooling, factory management, production builds, and shipping logistics. For inventors who have not been through a launch before, this is the stage where the most expensive surprises happen — and where having an experienced team running interference makes the largest practical difference.
Supply chain qualification identifies and vets the suppliers who will actually produce the parts. Picking a factory based on the lowest quote is the most common manufacturing mistake — supplier quality, reliability, communication, and the ability to handle small launch volumes matter more than headline pricing. A qualified supplier is one that can produce the design to specification, repeatably, at the scheduled cadence.
Design for manufacturing (DFM) review aligns the design with the chosen production process before tooling is committed. DFM covers tolerances, material specifications, assembly sequences, surface finish requirements, and fastener selections — each measured against what the supplier can actually do. Engineering changes after tooling is cut are dramatically more expensive than changes at CAD, which is why DFM review is the gate that protects every dollar that follows it.
Tooling investment — injection molds, stamping dies, machining fixtures — is committed only after DFM is complete. Factory management covers the operational discipline of ensuring what the factory produces matches the design intent: first-article inspection, statistical process controls, in-line quality checks. Build product is the production run itself. Shipping and logistics handles the path from factory to fulfillment — customs, freight, warehousing, and the unglamorous details that determine whether the launch ships on time.
Supply chain qualification vets suppliers on quality, reliability, and small-volume capability — not just price.
DFM review aligns design tolerances, materials, and assembly with the supplier’s actual capabilities.
Tooling investment is committed only after design validation and DFM review are complete.
Factory management protects design intent through first-article inspection, process controls, and quality checks.
Deliverables: qualified supplier list, manufacturing documentation package, tooling, production parts, shipping logistics plan.
Stage 6 maps to Phase 3 of the four-phase framework — sourcing and manufacturing. The operational coordination at this stage is what separates a launch that ships when planned from one that slips into a worse market window.
Stage 7 — Branding & Launch
Stage 7 is the part of the process many inventors discover too late: a manufactured product still has to be launched as a business. Branding establishes the visual identity and positioning the product uses in the market. Go-to-market strategy defines channels, pricing, and launch sequencing. Launching the business itself covers the operational reality of becoming a company that sells a product — from initial customer acquisition through the back-office systems that support ongoing sales.
Branding work starts with positioning: what the product is, who it is for, and how it is different from alternatives. From positioning come the visual identity, the brand voice, the packaging design, the website, and every customer-facing touchpoint. For a first product, branding does not need to be lavish — it needs to be coherent. A consistent, clear brand outperforms a fragmented expensive one almost every time.
Go-to-market strategy answers the practical questions: which channel (Amazon, retail, DTC, Kickstarter, regional partners), at what price point, on what launch cadence, supported by what marketing. Channel selection has the largest single impact on launch economics — a product priced for Amazon may not work in specialty retail, and vice versa. Sequencing matters too: a small soft launch before a wider release surfaces issues at lower stakes than a single big-bang launch.
Launching the business is the operational reality that turns a manufactured product into a sustainable revenue stream: customer acquisition channels, fulfillment systems, customer support, returns handling, warranty processes, and the back-office systems that keep all of it running. A great product without these systems in place tends to under-perform its potential simply because the company cannot scale to meet the demand it generates.
Branding establishes positioning, visual identity, and the customer-facing presentation.
Go-to-market strategy defines channels, pricing, launch sequencing, and marketing support.
Launching a business covers customer acquisition, fulfillment, support, and the back-office systems behind ongoing sales.
Coherence matters more than budget — a consistent simple brand beats a fragmented expensive one.
Deliverables: brand identity guidelines, go-to-market playbook, launch campaign plan, operational setup.
Stage 7 maps to Phase 4 of the four-phase framework — branding and marketing. It is the stage most overlooked in traditional "product design process" discussions, and the one most commonly underestimated by first-time inventors.
How Rabbit Product Design Guides Inventors Through All 7 Stages
Rabbit Product Design is a product development firm built around the inventors, entrepreneurs, and small founders who carry the most risk on a first physical product. The firm has been in business for nine years, has worked on over 2,000 products, and is staffed entirely by senior engineers — an average of 27 years of experience per team member.
The service model covers all seven stages end-to-end across four operational phases: research and ideation, design and prototype, sourcing and manufacturing, and branding and marketing. One coordinated team handles patent research, product evaluation, industrial design, mechanical engineering, electronics, firmware and app development, prototyping (from printing to molding, CNC machining, and soft tooling), supply chain qualification, tooling, factory management, shipping logistics, and the brand and go-to-market work that turns a manufactured product into a launched one. Clients can engage the full sequence from initial concept through launch, or pull in specific services at a particular stage.
Rabbit’s focus reflects who actually benefits from end-to-end stage coverage: consumer products of all kinds, soft goods (bags, cases, wearables, sports gear, pet products), hardwood products (furniture, fixtures, displays, storage), electronic products and IoT devices, and inventor or entrepreneur projects spanning every category. Most clients are individuals or small business owners — the audience that large enterprise design firms are not built to serve at accessible cost.
Three things shape how engagements run day-to-day. Senior engineers handle every project from the start — there is no junior tier doing the early work. DFM and risk mitigation are embedded from concept onward, not bolted on as separate audits at the end. And the firm is built to be accessible to people developing their first product, not only to funded startups with seven-figure budgets.
Key Services
Phase 1 — Research & Ideation
Patent research and freedom-to-operate analysis
Product evaluation and opportunity validation
Technology research
Phase 2 — Design & Prototype
Industrial design and creative product design
Mechanical engineering
Electronics design, firmware development, and app development
Prototyping: from printing to molding, CNC machining, and soft tooling
Design reviews at defined gates
Phase 3 — Sourcing & Manufacturing
Supply chain qualification
Tooling and molding
Factory management and quality control
Production builds, shipping, and logistics
Phase 4 — Branding & Marketing
Brand identity and positioning
Go-to-market strategy
Operational launch support
Key Benefits
Senior engineers on every project, averaging 27 years of experience
One coordinated team from concept through launch — no agency handoff errors
Risk mitigation and DFM embedded at every stage, not bolted on at the end
9 years and over 2,000 products of accumulated process experience
End-to-end services accessible to individual inventors, not only to funded companies
To start a product development engagement that covers all seven stages under one team, contact Rabbit Product Design.
Conclusion
The seven stages of the industrial product design process — research and patent validation, concept development, industrial design, mechanical and electronics design, prototyping and validation, manufacturing and sourcing, and branding and launch — are the sequence that turns an idea into a product on the market. Each stage produces evidence that gates the next; skipping or compressing any of them produces the failure modes that derail most first-time launches. To start a product development engagement with senior engineers covering all seven stages, contact Rabbit Product Design.
FAQ
How long does the full 7-stage process take?
Timelines vary significantly with product complexity, the number of prototype iterations required, electronics content, and any regulatory work involved. Simple consumer products can move from concept through manufacturing-ready in a matter of months. Products with significant electronics, compliance requirements, or unusual materials take longer. The single largest factor in timeline overruns is unplanned iteration caused by problems found late — which is what a structured, gated process is built to prevent.
Can stages be skipped or done out of order?
Skipping stages is one of the most common causes of expensive late-stage failures. Skipping Stage 1 (research and patent validation) means risking a blocking IP discovery after tooling is committed. Skipping Stage 5 (prototyping and validation) means launching with unverified assumptions about how the product behaves in real use. Stages can sometimes overlap — industrial design and mechanical engineering should run concurrently — but they cannot be eliminated without bearing the cost downstream.
What is the difference between Stage 5 (prototyping) and Stage 6 (manufacturing)?
Stage 5 produces a small number of parts to test the design itself — does it fit, does it function, does it survive the load case. Stage 6 produces parts at production scale using production processes — a different set of decisions about supplier selection, tooling, quality control, and logistics. The validated design from Stage 5 is the input to Stage 6. Treating them as the same stage is a common mistake that leads to under-investing in manufacturing preparation.
When should patent research be conducted?
Patent research belongs at the start of the process — Stage 1 — not at the end. A freedom-to-operate search identifies existing patents that could block the design before significant development investment is committed. Discovering a blocking patent after tooling has been cut is one of the most expensive and most avoidable problems in product development. Many engagements also include filing a provisional patent application at the prototype stage to lock in a priority date while design and testing continue.
Why is branding (Stage 7) part of a product design process?
A great product without a clear brand identity, a go-to-market plan, and launch operations in place tends to under-perform its potential. Stage 7 turns a manufactured product into a launched one. The work — brand identity, channel strategy, pricing, marketing, customer acquisition, fulfillment, customer support — is what separates a product that ships into a market from one that simply exists in a warehouse. Including it in a product design process reflects the operational reality of getting a first product to commercial success.
Sources
Keywords: industrial product design process, product development stages, design for manufacturing, prototyping services, integrated product development
